You always remember your first time. My first chili cook-off took place in a bar on Allen Street in Buffalo’s gay village. My (American) partner at the time suggested I enter the contest. He knew I made a great chili, but little did he know how competitive I was. When my kitchen OCD kicked in, I made the most delicious—nay, the absolute GREATEST chili of all time and ground the competition into dirt.
You’ll notice throughout this recipe that I haven’t included measurements. This is because chili is a very subjective dish, and only you know how many portions you’re making and for what kinds of taste buds.
Chili Thriller
One story has it that chili con carne was originally made of ill-fated Spanish conquistadors who were killed and then butchered by the Aztecs in what is now Mexico. The recipe also included wild tomatoes, hot peppers and oregano.
STEP 1
To make award-winning chili, you need the right beans. There are many options, including even white navy beans for polar bear chili, for example, but today we’re sticking to the red kidney bean, the quintessential chili bean.
STEP 2
Soak your beans! It trims down cooking time and helps the beans cook more evenly. I recommend 10 to 14 hours. Championship tip: If you change the water throughout this process, you will get less gas after eating your delicious chili. The Irish have a joke about it: Why did the Irishman put only 239 beans in his chili? Because if he added one more, it would be too farty. Wah-wah! At the very least, don’t forget at least one rinse in cold water before cooking.
STEP 3
The biggest thing to realize about beans is that they take time. Once they’re on the stove and simmering, it can take anywhere from one to three hours (and occasionally longer) for them to become tender. There’s no predicting it. The age of your beans, the variety and the size all affect the cooking time. Don’t try to rush things by increasing the temperature on the stove. This will rough up the outside of the beans and make them mushy. Fill the pot with enough water to cover the beans by one inch. Bring the beans to a quick boil, then keep them at a very gentle simmer for the rest of the cooking process. Add salt when the beans become just barely tender. You can slow down the cooking of the beans if you add the salt too early.
STEP 3
I add a mixture of aromatics to the beans while they’re cooking using two paper coffee filters and butcher’s twine. Place a bouquet of your favourite herbs and spices in the middle of one filter. Go crazy with this, using whatever you think has the best smells (you taste with your nose before your mouth!). I use bay leaves, sage, saffron, mixed peppercorns, cumin, oregano—the list can be as long as you like. Fold down each corner to make a little square package, then flip it upside-down inside the other filter. Then fold that outer filter into a square and use twine to keep it all together. It’s like a big aromatic tea bag for your beans. Keep the lid open a bit while simmering to fill the house with the aroma.
STEP 4
While the beans are doing their thing, grease a large sauté pan or cast-iron skillet with ghee (clarified butter, one of my cooking staples) and throw in diced carrots, celery, onions, green pepper and red pepper. I believe most people want some heat in their chili, so I add diced jalapenos and one habanero, seeds and all. You want it spicy but not hot. Add chopped garlic to taste—I’m of Greek background, so I use a lot of garlic, my Achilles heel of flavour. Cook all this down at medium heat until the onions become translucent.
STEP 5
Here comes the biggest debate in the chili world: meat or no meat. I enjoy it both ways, but today I’m using ground chuck, as lean as possible for less greasy chili. Don’t skimp! Remember that we’re trying to win a chili contest here. Throw your ground chuck into a separate skillet on medium-high heat and season with salt and pepper. You want a good sear on the meat.
STEP 6
When both skillets are done, amalgamate them into your giant chili pot with the tomato base. I usually use top-quality cans of diced tomatoes and one little can of tomato paste, at a 2:1 ratio. You may want to drain the meat, but I keep the jus for more flavour. Have that mixture going on a medium-low heat.
STEP 7
OK, this is when the magic happens. Fine-tune the meaty slurry by adding granulated garlic, smoked sweet paprika, cumin, dried oregano, onion powder and a few handfuls of frozen corn. I’m constantly seasoning with a pinch of salt and pepper in between steps, too, but be careful with the salt. It’s a slippery slope.
STEP 8
This next step is my secret: Add two ounces of amber maple syrup to the pot. This cuts the acid from the tomatoes and fuses the flavours—and makes this bowl of goodness more Canadian. Amber maple syrup is best for cooking, because it’s more robust. I also add four or five drops of liquid smoke.
STEP 9
When the beans are done and rinsed, discard the aromatic tea bag and stir the beans into the pot, cooking for another five to 10 minutes. Adjust your salt content and we’re done—or arrrrre weeeee?
STEP 10
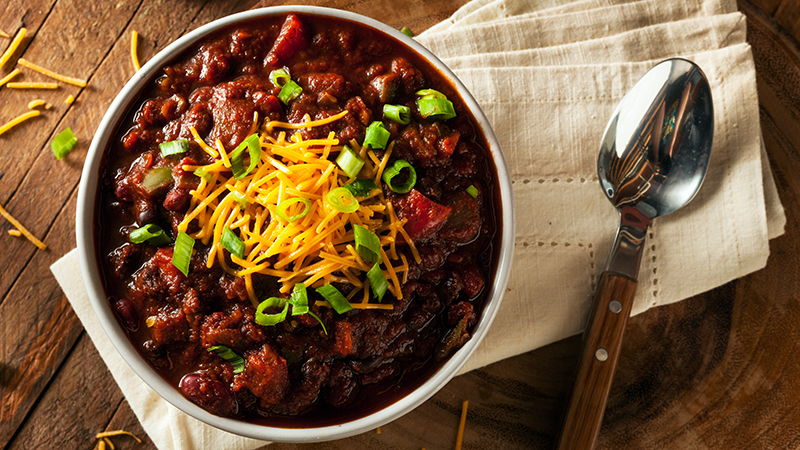
Definitely make this chili the day before the cook-off to let the beans absorb all the flavours. I promise it will be worth the wait. Keep in mind that you will need 30 to 45 minutes to heat it back up again. For toppings, I grate old cheddar, add a small dollop of sour cream and top with finely sliced spring onion (only the greens). Serve with a couple of slices of garlic bread.
I’ll leave y’all with a final piece of advice: Don’t cut corners. If you want to be a great cook, you need to treat every ingredient with the respect it deserves, giving it the time to do its thang so you can do your thang, with your eye on the prize.